Every time Slave 1 shows up, it’s an instant “wow” moment. This ship has a presence like no other, from its unique design to its heavy firepower.
But what about the inside? Have you ever wondered how Boba Fett actually operates this thing? I couldn’t stop thinking about it, so I went on a quest to figure it out. Here’s what I found.
A Closer Look at the Legendary Ship

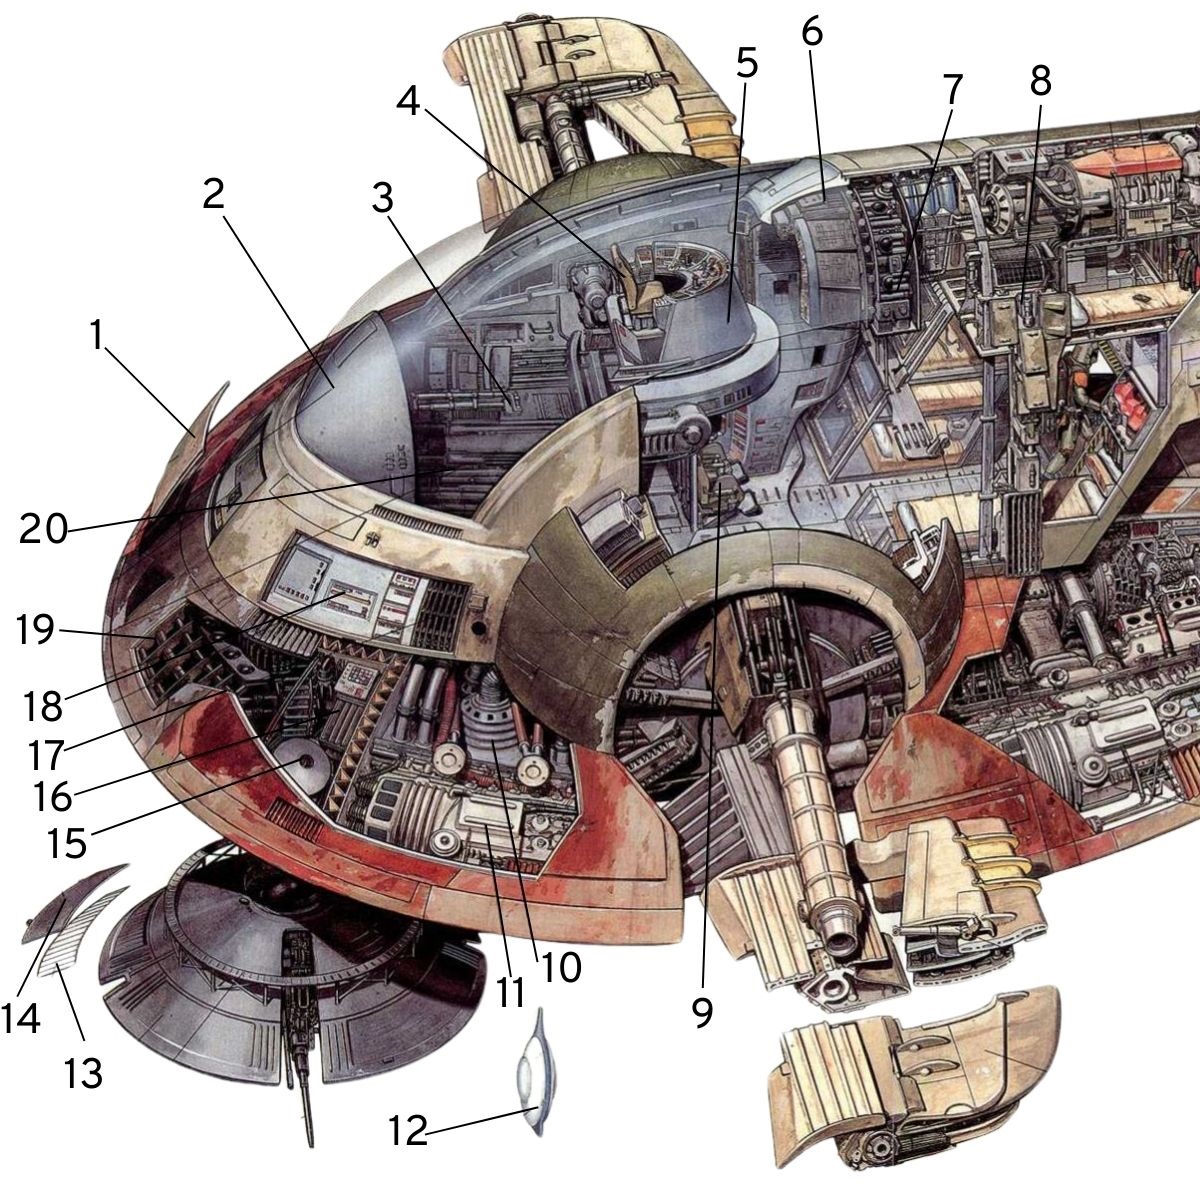
1. Armor plate
2. Cockpit energy shield
3. Tracking system monitor
4. Pilot’s seat
5. As Slave 1 comes in to land, the cockpit capsule rotates to keep Boba Fett and any passengers upright
6. Flight computers
7. Sensor array
8 .Hidden panels conceal the ship’s powerful ion cannon
9. Passenger seat
10. Main engine
11. Power generator
12. Dymek concussion missiles are used to disable opponents shield generators
13. Passive long-range sensor bands
14. Interference shielding
15. Communications monitor
16. Tachyon emission detector
17. Fuel baffles
18. Fuel monitors
19. Sensor jamming unit
20. Cargo hold

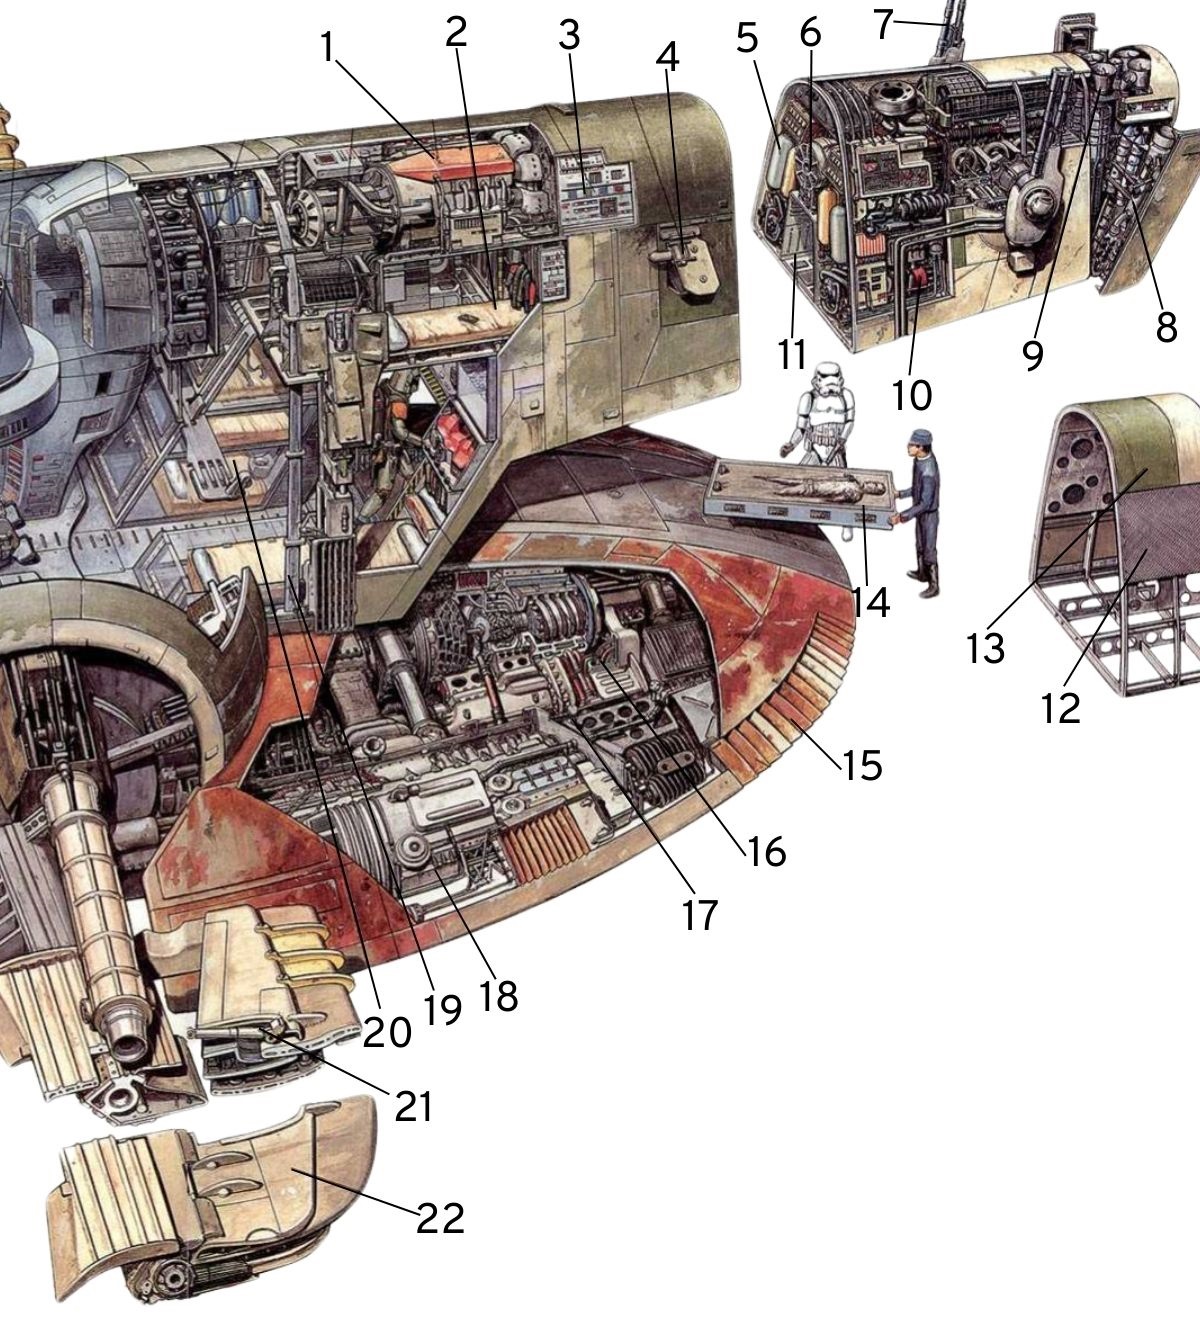
1. Tractor beam generator
2. Pilot’s sleeping quarters
3. Weapon control systems
4. Static discharge port
5. Life support
6. Spinal trunk line carries data from ship systems and weapons to main computer
7. Short-range twin blaster cannon
8. Proton torpedoes, concealed by hidden panels, deploy to either side
9. Composite tractor beam projector in extensible turret
10. Laser generator
11. Access crawlway
12. Anti-ionization mesh
13. Outer plating
14. Han Solo encased in carbonite
15. Radiator fins
16. Deflector generator
17. Boba Fett is about to raise the cockpit capsule to make room for Han to be stored in the cargo hold
18. Power generator
19. Stabilizing field projector
20. Prisoner cages
21. Wing extension struts
22. Repulsorlifts rotate to maintain support for the ship as it comes into land on its back.
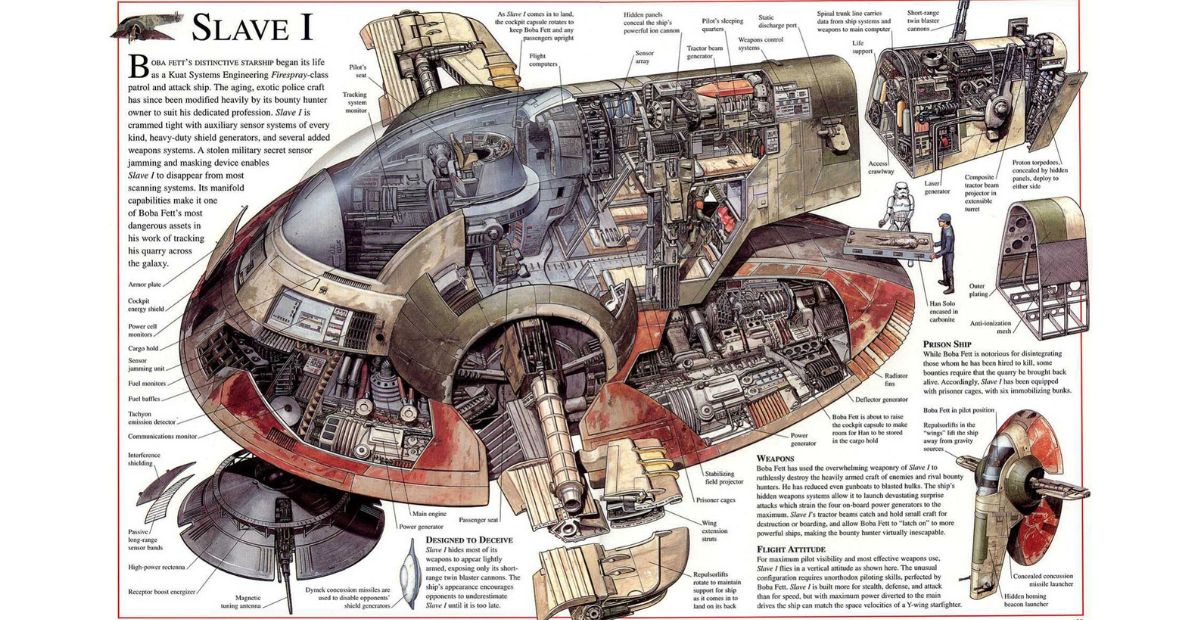
That covers everything about Slave I. Below, you’ll find a detailed image showcasing all its features.


