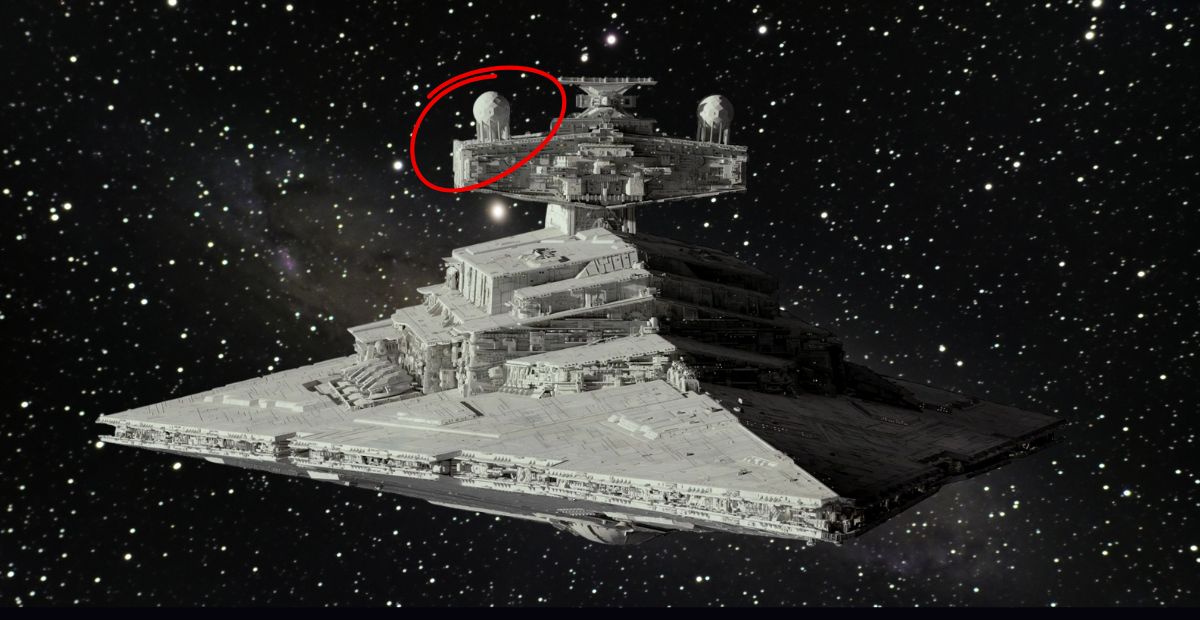
Alright, I just came across a question that’s probably crossed every Star Wars fan’s mind at some point—what are those two dome-shaped structures on top of Imperial Star Destroyers?
You know the ones I mean—those twin orbs perched above the command tower, right behind the bridge. They’re in almost every Star Destroyer shot, but no one ever explains what they are in the movies. o I’m here to break it down for you.
They’re Called ISD-72x Deflector Shield Generator Domes
According to Star Wars: The Rise of Skywalker – The Visual Dictionary with Exclusive Cross Sections, those twin domes perched above the Star Destroyer’s command tower are exactly what we think they are—shield generators.
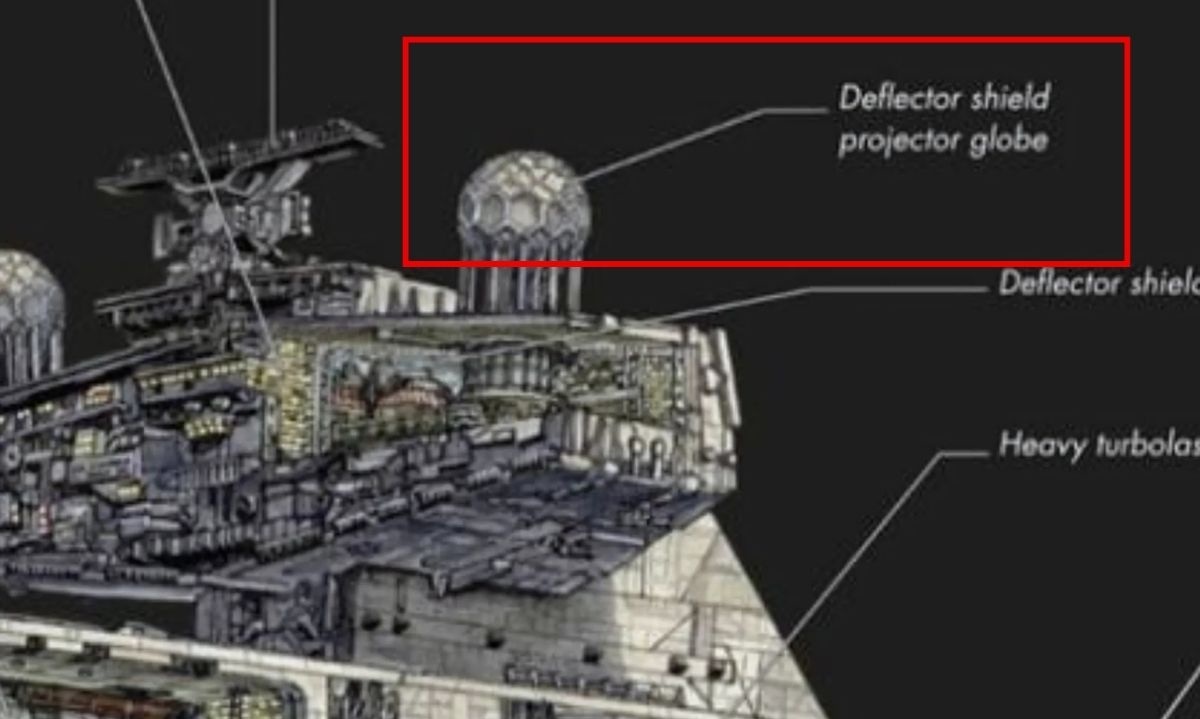
But for a more specific name, Star Wars: The New Essential Guide to Weapons and Technology identifies them as KDY-ISD-72x Shield Generator Domes. These components are manufactured by Kuat Drive Yards (hence the “KDY” in the name), and they’re responsible for generating the deflector shields that protect the Star Destroyer during combat.
These shields defend the Star Destroyer from enemy fire, especially during space battles. Without them, the ship becomes an easy target. That’s why these domes are so important—and why taking them out can cripple the entire vessel.
We actually see this in action during the Battle of Endor in Return of the Jedi, when an A-wing crashes into the Super Star Destroyer Executor’s tower. Once the domes are destroyed, the ship loses its shields and is taken out shortly after.

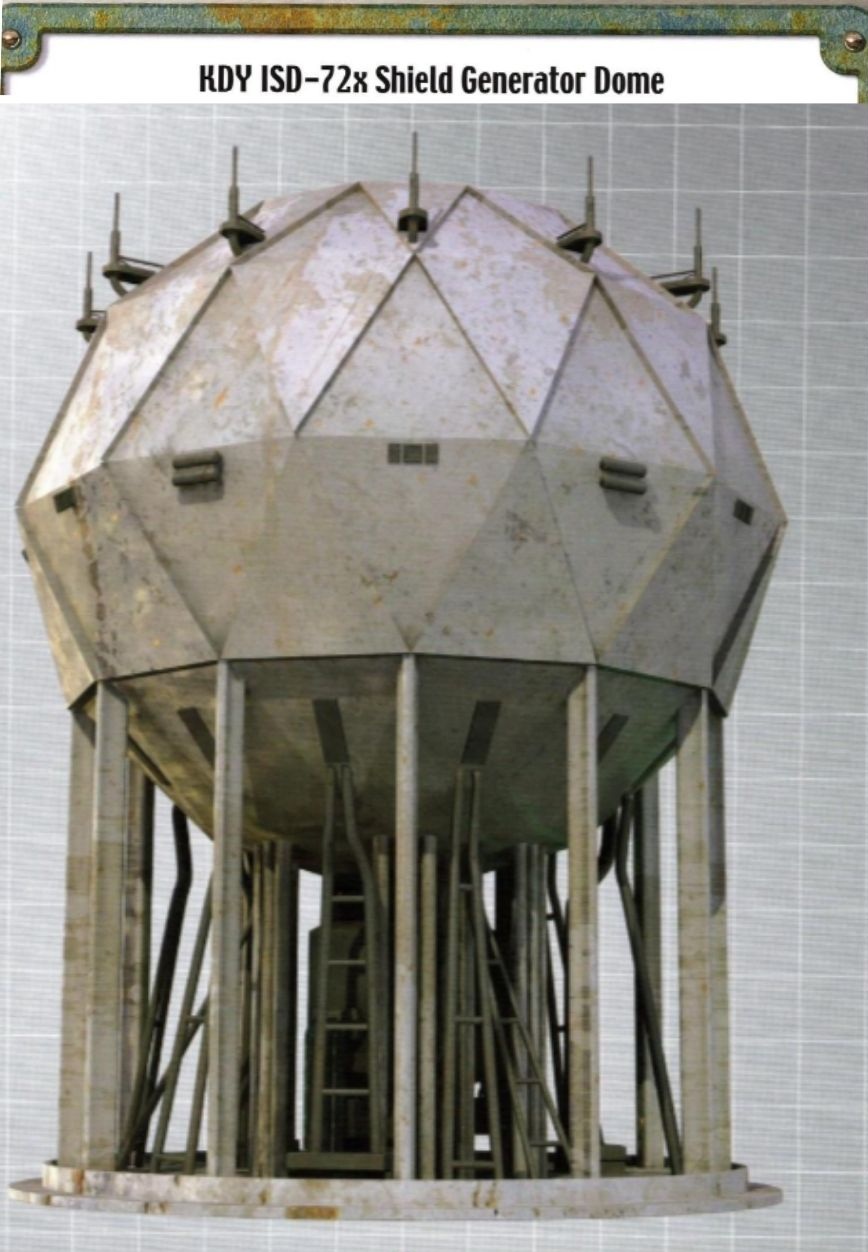
Inside The ISD-72x Deflector Shield
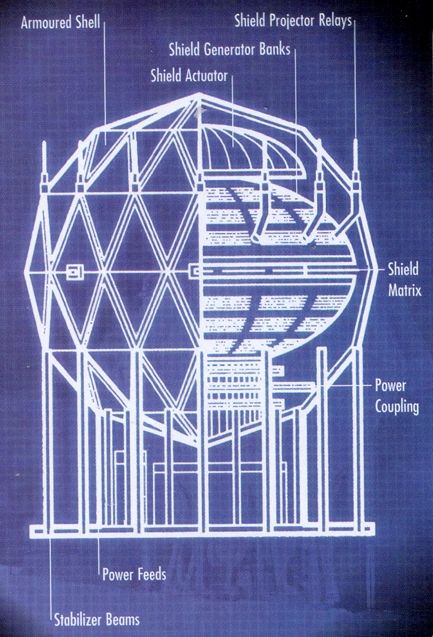
So now you know exactly what those domes are and why they exist—but don’t think we’re done just yet. Let’s take a look inside the shield generator dome and break down what makes these twin spheres powerful enough to protect an entire Star Destroyer. Starting from the outside, the dome is encased in an Armored Shell, which serves as the first layer of protection, shielding the internal systems from stray blasts and debris.
However, the shell isn’t invincible. It’s not designed to withstand direct collisions—small starships crashing into the dome or a well-placed suicide run can disable it entirely. That’s exactly what happened at the Battle of Endor, when the Executor’s shield dome was destroyed, allowing a Rebel pilot to crash into the bridge and take down the entire ship along with its crew.
Inside the shell, we find the Shield Projector Relays at the top, which are responsible for emitting the deflector field across the Star Destroyer. Just beneath those are the Shield Generator Banks, the core of the system, where immense energy is stored and managed. These banks power the entire shield network. Working with them is the Shield Actuator, a system that carefully regulates the strength and modulation of the shield, while the Shield Matrix directs how the energy flows throughout the field, keeping everything stable and responsive.
All of this energy has to come from somewhere, and that’s where the Power Coupling comes in—it connects the dome’s systems directly to the ship’s main reactor, while Power Feeds carry that energy upward to the generator banks. Supporting the entire structure are Stabilizer Beams, which keep everything aligned and intact, especially under pressure from battle damage or sudden surges in power demand.
All in all, what looks like a pair of simple domes on top of a Star Destroyer is actually a sophisticated, layered defense system—one that can protect a ship the size of a city, but also one with critical weak points. Take them out, and even the Empire’s most fearsome war machines can fall.