
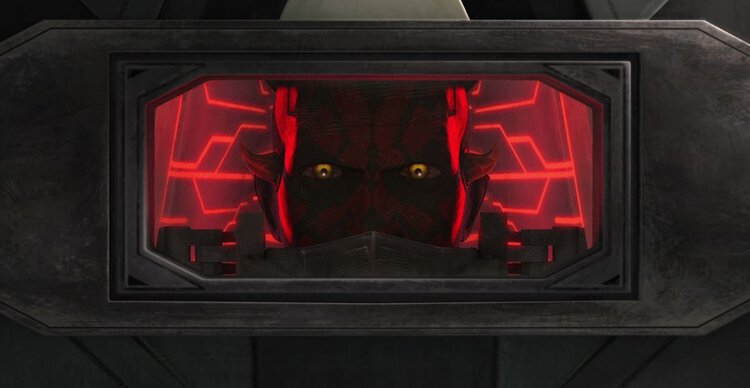
Maul had just watched Darth Sidious kill Savage Opress and tear down everything he had built on Mandalore. Instead of finishing him, Sidious dragged his former apprentice to a prison hidden on a frozen world. Maul was trapped, tortured, and surrounded by Separatist forces that answered to Count Dooku. Then two Mandalorians crossed the galaxy to pull him out.
Sidious Took Maul Alive For A Reason
Maul’s imprisonment began after the duel in Sundari. He had taken control of Mandalore, killed Pre Vizsla, and built the Shadow Collective from Death Watch and several criminal syndicates. That made him powerful enough to attract Sidious’s personal attention, but not powerful enough to challenge him.
Sidious killed Savage in front of Maul and defeated Maul without much trouble. Maul expected to die next. Sidious had something worse in mind.
Inside the prison, Sidious told Maul that staying alive was not an act of mercy. Maul still had a use. That purpose is the key to the whole escape, because Sidious wanted Maul to lead him to Mother Talzin.
Talzin had restored Maul’s mind and body after Savage found him. She was also one of the few dark side figures Sidious treated as a serious loose end. Killing Maul immediately would remove a rival, but keeping him alive created a path to a more important target.
Maul Was Locked In The Spire
Sidious took Maul to Stygeon Prime, a cold and mountainous world in the Outer Rim. The prison there was called the Spire, a fortress built into the planet’s harsh landscape. It was remote, difficult to approach, and protected by Separatist battle droids.

Maul was held on level seven. Count Dooku entered his cell and demanded the names of Shadow Collective leaders and the locations of their bases. Maul refused, mocked Dooku as a replacement for Sidious’s real apprentice, and endured Force lightning rather than surrender his organization.
The interrogation had two purposes. Dooku could still collect useful intelligence if Maul broke, but the pain also helped sell Sidious’s lie. Maul needed to believe the Sith wanted to destroy the Shadow Collective. If he escaped and watched his forces collapse, he would be pushed toward Talzin for help.
The Spire was not an empty room with an unlocked door. Its garrison reacted to the rescue, and Dooku recognized the attackers’ plan almost immediately. Sidious did not simply announce that Maul was free. He created a situation where Maul could believe he had beaten the prison.
Almec Sent Two Mandalorians To Get Him Out
Maul did not escape alone. Prime Minister Almec organized the extraction from Mandalore and sent Gar Saxon and Rook Kast, two Mandalorian super commandos who remained loyal to Maul.
They had followed Sidious’s ship to Stygeon Prime, which gave them the location of a prison that very few people knew existed. Their mission was simple in theory: enter the Spire, reach level seven, free Maul, and take him to the Shadow Collective base on Zanbar.
Sending only two commandos made sense. A large assault force would have been detected before it reached the prison. Saxon and Kast could move quickly through the facility, carry the explosives needed for a breach, and leave aboard a waiting Gauntlet fighter.
Almec also gave the mission a clear destination. Maul would not be left wandering on Stygeon Prime after the rescue. His people were already gathering on Zanbar, ready to return the Darksaber and put him back in command.
The Breakout Was A Precise Strike
Saxon and Kast began by planting explosives on level three. The blast pulled security away from their real target on level seven. While droids responded to the apparent emergency, the commandos moved deeper into the Spire.
Dooku was not fooled for long. When he heard that the explosion was on level three, he ordered droidekas toward level seven because he understood that Maul was the likely target. The rescue team now had to fight through the prison rather than slip out unseen.
Saxon and Kast used electromagnetic explosives against the super battle droids in their path. They then used heavier weapons against the droidekas and reached Maul’s cell. The prison break worked because every piece had a job: one explosion moved the guards, specialized charges disabled droids, and a rocket created an exit where the prison had none.

Once Maul was free, the three did not retreat through the same corridors. They fired through the outer wall and used a zipline to cross the frozen gap outside the Spire. Kast provided cover while they moved toward the waiting ship. The commandos had turned the fortress itself into their escape route.
That detail matters. Maul did not tear through the Spire by himself, and he did not overpower Sidious or Dooku. Almec found him, Saxon and Kast breached the prison, and their Gauntlet fighter carried the team off Stygeon Prime.
Dooku Saw The Rescue Coming
The prison’s response can look strangely weak when the target is one of the most dangerous Force users alive. Two commandos enter, blast through several droids, free Maul, and escape from a fortress described as nearly impossible to break. The missing piece is that Dooku’s goal was not to keep Maul there forever.
Dooku still sent forces to stop the intruders. Saxon and Kast had to survive real resistance, and their plan could have failed. But Sidious had already decided that Maul was most useful outside the cell. A believable rescue served the Sith plan better than an obvious release.
If the Separatists had allowed Maul to walk out without a fight, he would have suspected manipulation. Instead, he saw loyal soldiers risk their lives to reach him. He saw droids try to stop them. He left believing that his own organization had beaten Sidious’s prison.
The Mandalorians were not working with Sidious. Almec, Saxon, and Kast genuinely wanted their leader back. Sidious simply understood what they would do and turned their loyalty into part of his trap.
Maul Escaped The Cell, But Not The Trap
The rescue ship flew to Zanbar, just as Almec had ordered. That made the next step easy for Dooku. The Separatists tracked Maul to the Shadow Collective base, and Dooku sent General Grievous after him with careful instructions.
Grievous was not supposed to kill Maul. He was supposed to damage Maul’s forces, break his confidence, and leave him desperate enough to seek Talzin. The prison escape gave Maul freedom of movement, but it also placed him on a route the Sith could follow.
At Zanbar, Maul reunited with his Mandalorians and received the Darksaber, which Almec had recovered after the fighting on Mandalore. For a brief moment, it looked as though the Shadow Collective had recovered. Maul was armed, surrounded by loyal troops, and ready to fight back.
Then Grievous arrived with the droid army.
Zanbar Revealed Sidious’s Real Plan
The battle on Zanbar was costly for both sides. Maul’s Mandalorians were skilled enough to inflict heavy losses, and Maul fought Grievous directly with the Darksaber. Numbers eventually decided the battle. The Separatist army kept pressing while the Shadow Collective’s position collapsed.

Maul ordered a retreat and escaped aboard a Gauntlet fighter. That was exactly the result Dooku wanted. Grievous had hurt Maul without killing him, reduced the strength of his organization, and made Talzin look like his best remaining source of help.
The attack also explains why Sidious could risk letting Maul leave the Spire. Maul was not being returned to full freedom. He was being moved from a controlled prison into a controlled chase. Sidious knew the destination, had an army ready to strike, and could decide how much pressure to apply.
Maul eventually understood that he was being used and tried to reverse the game. The conflict expanded across Ord Mantell, a Mandalorian outpost, and Dathomir. Even when Maul captured Dooku and Grievous, Sidious kept moving toward the target he wanted. The campaign ended with Talzin confronting Sidious and dying at Grievous’s hands.

This Story Is Part Of Star Wars Canon
Maul’s escape was told in Darth Maul: Son of Dathomir #1. The comic was adapted from scripts prepared for an unfinished The Clone Wars story arc. It bridges Maul’s capture at the end of “The Lawless” and his later return in the final season of the series.
So the direct answer to how he did his escape is that Saxon and Kast physically freed Maul, Almec arranged the mission, and Sidious allowed the larger escape to serve his hunt for Talzin. Maul broke out of the Spire, but he never escaped Palpatine’s plan.